| DESIGN
I was first intriguied by
the look of a Launch Pad Rockets
copy of the AS-17 "Krypton" and immediately
knew I wanted to upscale. First I needed to research the original
missile to assure myself of the dimensions needed and not just upscale
from the Launch Pad model. My only objective was to make the scale dependent
on a four inch diameter body tube. 
I was not able to find scale
line drawings so I had to design from sizing and information both from
the Launch Pad version to scale up and scale down from what information
I could obtain on the web about the original Kh-31 missile.
I carefully measured the
parts from the Launch Pad Kit off the instructions and compared them to
Kh-31 dimensions found on the web. From these measurements I was able to
derive dimensions for my four inch diameter high power rocket scratch build.
The only dimensions of usefulness were diameter and length. Specific lengths
of ramjet and fins I had to upscale from the Launch Pad kit. In general
the scales I used were an approximate 1/3 scale of the original and 1.538
times the Launch Pad kit. After analyzing the ratio in RocSim I decided
it would be more flight worthy to extend the length. It is also more visually
appealing.
KRYPTONITE Construction Scale:
| Model |
Length |
Diameter |
| Launch Pad "Krypton" |
36.25" |
2.6 " |
|
|
|
| Kh-31 |
4.7 Meters (15.4 Feet) |
0.36 Meters (1.2 Feet) |
| Kh-31A |
4.7 Meters(15.4 Feet) |
0.36 Meters (1.2 Feet) |
| Kh-31P |
5.23 Meters (17.2 Feet) |
0.36 Meters (1.2 Feet) |
|
|
|
| "Kryptonite" 4" Sport Scale |
64.25" |
4.0" |
My only other clue to design
was from available photos of the missile.
SIMULATION
To make sure that Kyrptonite
would fly well, I had to first build the model in RocSim. i have measured
all parts of the Launch pad kit and using the supplied kit instruction
sheet, upscaled the placement dimensions of parts. The problem with RocSim
3.0 is designing tubular fins. I simply tried to add more parallel fins
to replicate the four tube surface area. In a later step I will weigh the
rocket to balance the real weight of the rocket in design simulation.
PIECES and PARTS
/ GLUE
Parts used in construction
of the Kryptonite:
| Nose Cone |
PML 3.9" long (16.25") |
| Payload |
LOC paper 3.9", 14" length |
| Body Tube |
LOC paper 3.9", 34" length |
| Fins |
3/16" birch 4 ply |
| Coupler |
(1) 6" LOC paper,(Altimer
bay) (1) 3" LOC Paper (tail support) |
| Motor Mount |
38mm LOC paper, 12" length |
| Centering Rings |
(2) 3.9" 3/16" plywood,
38mm |
| Motor Retention |
|
| Ramjets |
(4) 38mm paper tubes 25.25"
length,
(4) 1/8" 38mm bulkhead plates,
(4) 1/2" dowels, 2" length,
(4) Balsa tailcones hand
crafted |
| Shockcord |
(2) 1" tubular nylon 20'
w/loops; main chute and droge chute |
| Altimer Bay |
scratch built with (4) 3.9"
bulk head plates, 1/4" rods |
|
|
COMMING TOGETHER
The first construction activity
was the sizing and cutting of the outboard fins. I chose 3/16" 4
ply plywood for the fins as I am not as confident in shaping G10 fiberglass.
Also, there is not as much a weight difference between G10 and 3/16" ply
as with 1/4" plywood. Two sets of four fins are required on this
project, I simply copied the fin template from the Launch Pad "Krypton"
kit and allowed for the thickness of the ramjet tube, a 38mm paper tube.
I sanded the fins with a rounded edge and set them aside while I made a
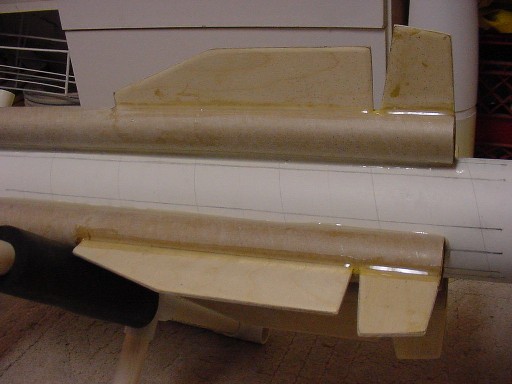
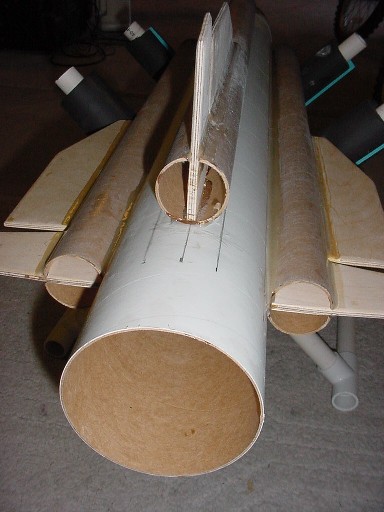
12.25" hand slot cut in each of the ramjet tubes. Next I epoxied
the fin sets in the ramjet tube. (Fig.1 & Fig. 2). The creation of
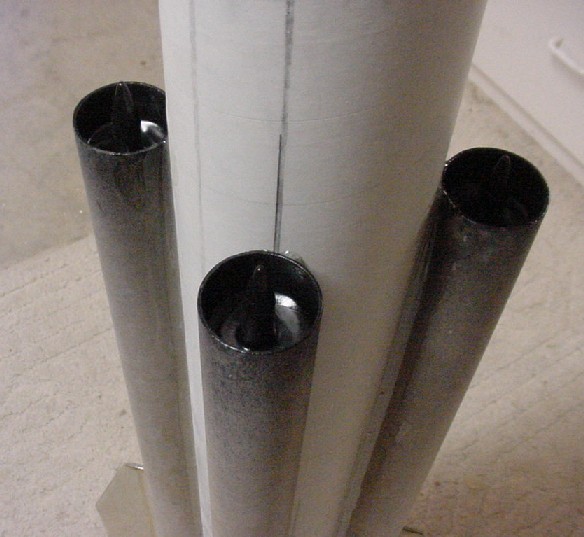
the ramjet required hand shaping a point on the end of a 1/2"x2" dowel
and center mounting it on a 38mm x1/8" bulkhead plate with a small screw
and epoxy. The assembly was mounted 1" deep into the forward end of each
of the ramjet tubes. (Fig.3).
 |
 |
 |
| Figure 1 |
Figure 2 |
Figure 3 |
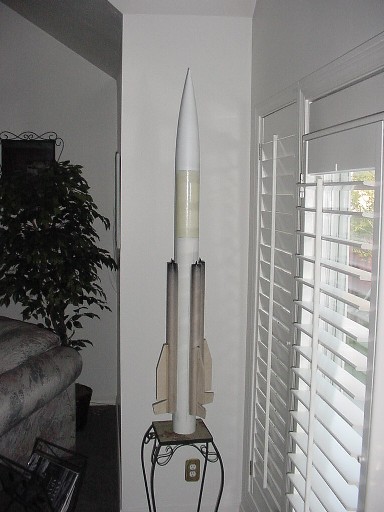
The four ramjet tubes were
cross mounted 3.9" forward of the tail of the 34" body tube. Heavy epoxy
fillets were applied. Side fillets to create a smooth vertial sidewall
on the tubes were crafted using wood filler and Kliz paint. Several interations
of sanding, kliz, and sandable primer were applied. Tail cones were ordered
from Balsa Machine Service.
I ordered four BT-60/50 transition sections and hand sanded them to fit
the rear of the ramjet assembly. Again more sweat effort to kliz
and sand and sand and kliz to get a smooth finish.
Several tries of painting
the nose cone with light sanding and repeated paint and sand brings a great
smooth paint finish. Epoxied into the cone a 1/4"x 4" eyebolt. The
assembly seems sturdy, but will also loop kevlar thread into the bolt using
the normal cord attachment eyes holes on the cone.
I will attempt the color
scheme currently shown on the Boeing version , XM-31.
To be continued ...

|